• Twitter
  • Facebook
  • Google+
  • RSS Feed

Sunday, 30 November 2014

Sadly for the second shoot I couldn't be there, as it took place Friday afternoon when our group film was shooting pick-up shots. I was however informed that the shoot would be taking place. Friday evening I received via email by Thomas the raw footage and some images of the locations that filming took place in. I really liked the footage that Thomas, Lauren and Julia had taken. It is again POV and a clearer, simpler narrative than the previous. What's also nice is the aesthetics of the clips, as the previous shoot was in Lauren and Thomas' house (Bedroom and Kitchen) and the Kitchen being quite messy made for distractions within the simplistic narrative whereas the new footage is aesthetically pleasing.

After the footage had been recorded, I decided to work with the sound, as I did the previous sound project for our Professional Toolkit unit. My job is to match the sounds kindly recorded by Julia, to the footage, so I have to match sound for the walking scenes, dog sniffing, pebble walking, car driving past and dog panting at the end. Thomas will be working on the programming of the piece, as he has a strong knowledge in the software we're going to use. Julia has a more hands-on role, working with the brain model and building what is needed in the gallery for our piece. Lauren's job is to edit the footage that will be displayed on the screen and to make sure it loops correctly.

Lastly, here are some great pictures that Thomas took to give an idea of the locations and story of the footage:


Friday, 28 November 2014

Today was all about getting pick up shot's that we felt we could do with Nick the following day, due to having the studio for two days. We took advantage of this and filmed numerous close up's, for example hand shot's of Ray ripping the hole, paper's on the wall and touching the TV's in the virtual world. We also got a few other shots such as over the shoulder shot's of Ray playing with the paper's on the floor. Some of these shots were hard to get due to Nick's hair being quite different to Ray's so I had to keep his head out of shot, including his shadow, which was quite difficult to do when it came to the breakout scene as Nick's shadow was in the shot a lot, however after some moving around of the camera and close zooming, I managed to keep his head more out of the frame than previous. I feel I have become proficient in using the Sony EX3 and the Samurai Blade. It took some time to get used to the numerous features on both, however after Anne spoke to me about the equipment, it made it much easier for me to understand how to use both. 


The Sony EX3 and Samurai Blade. 


The last shot of the day was my favourite of the whole shoot on both days. This was a dolly pan out of the hole, slowly panning upwards to show the whole set and crew working. A couple of takes were taken and I felt really happy with the outcome of this shot, which was achieved with the help of Nick and Sahir, who helped push/pull the dolly smoothly.


After this shot, Charlie called cut and we began packing away all the equipment and cleaning up the set. Our set was staying at Film Production student's wanted to use the set for the outline of their film they're going to make, which saves us time when it comes to cleaning up, unbolting the set and so forth. We received a lot of praise for the aesthetics of the set, which I felt was great due to the amount of work I had personally put in, when it came to papering the walls and so forth. Personally, I feel that I have worked really hard for this unit, contributing as much as I could when it came to building the set. Im proud of the effort I put in and i'm pleased with the camerawork I displayed. Even though I made a couple of mistakes, I found the process really hard work, but very interesting and exciting and worth the effort put in by myself.

Thursday, 27 November 2014


Today I arrived at 9:15am to wallpaper the hole over and set up all the camera equipment etc. The shoot started with a skateboard shot of Ray being thrown into the prison by Charlie. The shot took a couple of takes but it came out really well, and the Director and Cinematographer agreed. We did multiple takes of a few scenes, such as Ray getting angry due to where he's been placed, which was a very strong performance by Ray as I felt he showed the anger within his character very well. Most of the shots were static on a tripod or pans. One shot that was meant to be handheld had to be changed as it was virtually impossible to get a good, smooth camera movement, so it was placed on a tripod which actually turned out very well in my opinion. The Samurai Blade turned out very useful for the shoot as it allowed not only me but the other members of the crew to view the footage at the same time as me. Due to the screen being a much higher resolution, they were able to pick out little problems I couldn't, such as exposure.


We overrun our schedule slightly at times due to underestimating the time it would take to set up camera, lighting etc however once everything had been set up, the shots were achieved quite quickly. One issue I had was a simple pan up from the floor where Ray was sitting, up to the wall where Ray would stand after moving upwards. This was difficult due to the fact that the height I had to go to was very close to the very end of the wall, meaning there were a couple of failed attempts at getting it right.  I also operated the other camera we had, the Canon XF305, mainly for the breakout scene to get multiple angles. I had to change the exposure and white balance on this camera as it tended to give a very sepia-like tone to the set, whereas the white balance was just right on the Sony EX3. This was done with the help of Katherine, the camera assistant who was very helpful when it came to moving equipment, pulling focus, giving advice on shots, controlling the Canon XF305 and actually helping achieve some of the shots on the Sony EX3 with me (Skateboard pan of Ray's movement in the virtual world)

The breakout/virtual world scene was probably my favourite part to film. We had a multitude of angles for the breakout and I felt it came out really well on camera. This was also thanks to the great job the lighting team (Sahir and Tori) had done to make the light shine through the hole on the other side. It was also thanks to Anne and Chris, who suggested using the smoke machine when the hole had been broken into, to make it look really interesting. 


The hardest shot for me was the last shot of the day, which was a handheld movement shot from the TV's, panning to Ray's face, moving backwards curving around Laura, who was pretending to be a camera operator, eventually being passed through the hole to Katherine, who would move backwards to show the whole set. The shot took a few takes as it was difficult for it to not shake when it came to giving the camera to Katherine, however after watching the takes back using the Samurai Blade, we found a few takes that came out really well so that when it came to the editing process, we had a few to choose from. This was also the case for every other shot, as I always wanted a few takes to be taken of each shot, to give the editor, Nick, more variety.

I feel the shoot went quite well even after a couple of mistakes on my behalf, however I felt I picked up from any mistakes I made and improved and moved on. I feel I brought my own style to the shoot also, suggesting a couple of different ways we could approach the shot with the camera, for example the movement from a shaky handheld shot to a smooth, static shot giving the same effect, but looking a lot more professional. I've learnt a lot from today's shoot and I even received some praise from Anne about my camerawork, which was really great to hear. Anne was a big help during the shoot, mainly for technical camera support and tips and tricks that could execute a shot better. Overall i'm pleased with my performance, and look forward to filming pick up shots tomorrow.

Wednesday, 26 November 2014

During today's set built I once again helped wallpaper the walls and put the finishing touches to the hole i.e. put the bricks in place. We began the day by detaching the 2 side pieces to our set and attaching the 3 flats to the back of Group A's hallway set. This was tricky as we all had to work together to move the connected flats over a couple of meter's to Group A's set, however we did this successfully as a team and Nick attached our flats to their set. This for me was exciting as the aesthetics of the set were starting to come together. 


Nick bolting the flats together. 


Me, Nick, Sahir, Leanna and Chloe got busy wallpapering the other set's walls, which took a good few hours of tiring work. From the leftover teabags from Group A, we decided to use them to make the paper look old as a lot of the sheets were white and new looking, however we want the jail to look dull and dark, so tea-bagging the wall made the set look a lot more interesting. We used a fan to help the paper dry quicker. We did a wall breakout test, including myself breaking through the wall to see what it would look like.


I then helped Laura put down black carpet for when he breaks out into the virtual world. The carpets were quite large, meaning we had to overlap them. I hoovered the carpets also due to the amount of mess on them from previous use. After we did this we put the televisions in place, turned them on to double check they all worked (One eventually not working) and eventually tested lighting of the virtual world and television's. This was quite a long process as Tori and Sahir wanted the best result. After several attempts, the right lighting was finally achieved. 


We then moved the mattress that Laura kindly brought in and moved the books and table around to allow us to test the lighting for the Prison set. Nick was the test subject to make sure the placement of the props was correct and to get an idea of what Ray would look like within the set. 


After this was done, I went on a search for some cardboard to cover the whole, however it was suggested to us to use cartridge paper as it is durable enough to stand and won't be too hard to rip, like carboard would be. After this Chloe and Sahir cut the sheets of cartridge paper to size and covered the bricks with it. We decided to wallpaper the hole in the morning. Overall today was very busy and I felt that I contributed a lot to the set, which overall i'm very happy with.


Panoramic picture of the almost finished set. 

Friday, 21 November 2014

During today's set build I helped create the fake brick walling for the prison where our actor is going to break out of. This was done by putting clay on and then eventually painting fake blocks of foam that Chloe had purchased previously.


I them got involved with helping Nick cover and stick the bits of paper previously ripped out from the books kindly donated by a local charity to the wall. The end result looked interesting


Wednesday, 19 November 2014

Today we used B32 to test our television's out for the creative world. The biggest job was transporting all of the televisions, which took some time. We set up the space so we had the black backdrop to keep the scene quite dark, which is what the set will look like when we go to shoot. We positioned the televisions so that they could be stacked, however to get the final product we had to do a lot television positioning so that none of them would fall.


 Leanna and I sat behind the televisions to make sure they didn't fall whilst Tori and Sahir discussed lighting and did some tests and came out with some interesting results. We actually cut down the amount of televisions we're going to use as we all agreed it looked better with just the half a dozen television due to the fact that they all looked quite similar and blended together well. Nick was our test subject and we based the lighting around his positioning as this is what our actor will do. The positioning of Nick and the televisions gave me more of an insight of how I am going to go about filming the scene. Here are a couple of pictures I got of the testing process:


Tuesday, 18 November 2014

We went into the meeting with Rosie today with example footage from the test we did of the POV of someone waking up, making a cup of tea, laying down relaxing and then going back up to bed. Even though the footage that came out quite well, Rosie felt it had too much of a student vibe to it, and suggested filming a different kind of aesthetics. With this in mind we went off and had a think individually about what we could do.

Brain Model Attempt:


Using the website we'd used previously for inspiration, me and Julia decided to give it a go in making the clay model of the brain. Using my iPad to show the model of the brain that had previously been made, I decided to film a short time-lapse of the process. The process however was not successful as Julia and I found it too hard to model out how it should look. This meant that we had to contact Chloe, who was previously interested in giving it a go for us. Im happy we gave it a go, but obviously it got the better of us, however I trust Chloe can do a great job of modelling the brain for us.
 

Sunday, 16 November 2014

Today I met with Lauren and Tom to do some indoor test shots for the footage that will be displayed on the screen. We decided to use a DSLR for our test shoot, using Lauren's wide angle lens, to catch every bit of detail at each location.

 As we had an idea of it being a simplistic scenario, we decided to do a mixture of POV shots of someone waking up, putting on their jumper, picking up their tablet, walking downstairs, going into their kitchen, making a cup of tea, sitting on their sofa playing and game, heading back up to bed and falling asleep once again. The scenario itself was an easy concept, however getting a professional looking POV shot without a helmet rig (Shown right) was difficult. This meant Thomas had to film it from Lauren's perspective, so that both hands could be in shot to make it look more realistic and move around accurately, making sure she didn't hit into anything and kept a constant pace.

I feel that the shoot went really well and some really good shots were produced from it. What is difficult to get around is any shaky-ness from the camera, as that is just natural from the movement of the camera by Thomas. If we decided to re-shoot we may want to consider a helmet rig or some sort of tripod to allow the movement to be a bit more fluent.


Lauren and Thomas reviewing the footage

Friday, 14 November 2014


Today we learnt about how to use the new Sony EX3, a high end camcorder that will give us a professional end result. The greatest feature about the EX3 is that it allows you to take the lens off and attach another, allowing us to use a variation of lenses available to us to get the best result. Another cool feature is the Slow mo/Speed up option, where we can make footage slow down or speed up, straight from the camera, however it was recommended not to do so. That tool may have been useful for the wall-breaking scene, however Nick will be able to slow the footage down in post.

We also learnt how to use the Atomos 'Samurai Blade', an external monitor and recorder that has two outputs, allowing you to plug the EX3 into it via an SDI cable, which gives you a video and audio output. The greatest feature about the Samurai Blade is the record feature, allowing more people to see the shot and make sure the framing is okay, as the screen on the EX3 is quite small, so it makes it much easier to work out whats in the scene. As cameraman, I enjoyed using the EX3 and Samurai Blade, and found them pretty straightforward to use.

As for the set built, due to Group A stripping down the walls and beginning to work on the aesthetics of there set, it meant that we had to work with what we had, so we decided to go through the bags of books we got that were kindly donated by a local charity shop and rip up the books for the pages, to cover the walls for our set. We saved some older looking books for actual props to be stacked on top of each other. Overall I feel the day was very productive and we have moved one step forward in finalising our set.

Wednesday, 12 November 2014

During day two of the workshop, we looked at several things and took part in some interactive games to put us in an actor or actress' shoes.

Second Day of the workshop:

. We firstly looked at Performance and how Tone can change the meaning of a line/situation. The situation was the Male character was trying to get rid of the female character, by making her 'disappear'. The situation would escalate depending on the male character's tone when delivering the line. When the male character aggressively asked her to "Disappear' she was more close up and open with her anger, whereas when he had a softer tone to his voice and delivered the line, she reacted less aggressively. This intrigued me as it goes to show how the littlest of tone/tempo changes in the performance given by an actor/actress can give off a completely different mood and change the situation completely.

. We were then split into two groups of 10 and we played an interactive game were made to stand in a circle and one by one each person would walk into the center and say a number (starting from one, so one person walks into the center, eventually leading to 10 people walking into the center of the circle at the same time). If two people for example walked into the center of the circle and said 'One' then the whole game would restart. I felt the game was a trust exercise/teamwork building exercise to keep us on our toes, which played with Perception, and how focused we were on peoples movement/performance.

. The next exercise was another interactive game that required two volunteers (Molly and Ulysses, Nick and Rob took part). The game was simple. One character was the protector of the 'Hampshire Stone' who stood still protecting the stone, holding a sword (A roll of Greenscreen paper). The other was a thief, trying to steal the stone from the protector. Firstly, Ulysses and Molly had to pretend they had their eyes closed, even though they didn't, which was the same for Nick and Rob who followed. This brought out the performance element between the two characters as they had to act like they couldn't see anything and put on a performance. This made for an interesting performance by Ulysses, who used dialogue to try and shake Molly off. This was the same for Nick and Rob's performance. They then were made to do it again but actually close their eyes. This resorted in the character's listening closely for movement, as before they could see each other. This made for a much more interesting experience as it was funny seeing both sets of characters wander completely away from where the 'Stone' was. This also made for a tenser experience as none of us were sure if the protector would hit the thief with the 'Sword' because they couldn't see each other so they had to guess their movement.

. We then were told, in groups, to stand with enough space to move our arms, and walk in only straight lines in the space given to us. This resulted in few collisions. We were then however made to only move in curvy lines, which resulted in a more interesting and crazy experience, as people were less in control of their movement, resulting in collisions and a funny experience.

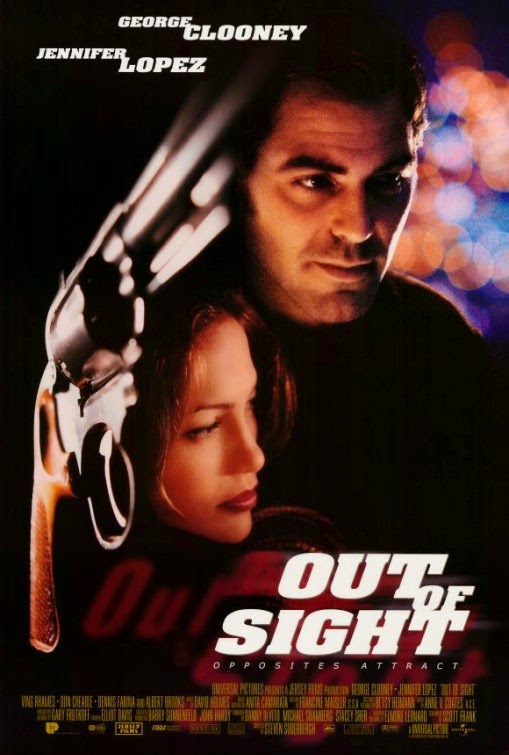
. We then looked at character importance, and how high each character was in the 'chain'. The film we looked at was 'Out of Sight' (1998) starring stars such as George Clooney, Jennifer Lopez Steve Zahn. The four characters all varied in importance and the scene involved a Two vs Two situation, with the leader and there accomplice. Me, Nick, Rob and Ulysses volunteered and I played 'White Boy Bob', one of the character's who was easily teased for being so big. We were made to stand depending on how we were being represented in the scene, so for example my character was being made fun of at several times in the sequence, so I had to crouch down and 'Lower' myself depending on the level of respect and importance I had at the time. A lot of the time I was crouching and 'Glenn Michaels', played by Ulysses at the time spent a lot of time laying down almost as his character had little/no respect being given to him. This gave me an interesting insight to character performance and social status of character's, which is something I didn't think so much about when it comes to making a film.

. We lastly looked at the delivery of lines, and how that can change the outcome of a situation (Similar to what we looked at the beginning of the lesson) and a combination of everything we'd learnt was put into this sequence at the end of the lesson. The actor and actress were made to re-enact a short part of the sequence we read previously, and would mix in Performance and Tone (how they deliver their lines) with the previous game where we moved in straight lines/curvy lines. They would do this depending on their character's social status (looked at in the previous game) so when one character was being overpowered by the other, they would begin to move in curvy lines and only stop if their character gained control of the situation. This was interesting to see this be performed.

Overall I feel I learnt a lot from the workshop about directing actors/actress' to get the best possible outcome. The interactive exercises helped me understand what it must be like for an actor/actress, so I feel I have more of an understanding when it comes to performance, so I can be more verbal with the actor/actress I am working with to get the performance I want.

Tuesday, 11 November 2014

During day one of the workshop we had with Nigel, I learnt several things and found the whole workshop very interesting and helpful for our current project/any projects I do in the future that involve working with actors/actresses.

First day of the workshop:

During the first workshop day, we looked at a variety of things, for example:

. Difference between Screen acting and Stage acting- Screen Acting is more about what is on the screen, so the actor/actress is limited to where they move, and placement is crucial, whereas stage acting is different, as actors can move freely around with little restriction, which is more similar to real life. The scenario shown to us was Sam, an actor who graduated from a top London acting school, standing within the boundaries of the frame (shown on a TV monitor directly plugged into a camcorder). He was made to position himself in different ways to get the shot that was needed (Standing/positioning himself in ways that looked strange to us however it worked when looking at the projection on the screen from the camera).

. We were briefly shown Camera Shot types, which was a continuation from the last exercise. The main shot types labelled by Nigel (Image on the right). As the camera was already set up from the previous exercise, Sam was made to act out a scene where he had to pretend he'd been waiting for his sister at an airport for hours and he thinks he sees her coming out of the tunnel, however its not her. But suddenly, it is her. This scene allowed Sam to show a variation of emotions, and position himself and move depending on what camera shot type Nigel wanted. For example the first shot was a simple full body shot, where his backpack was on the floor, and as he thinks he sees his sister, he picks it up to put it on his back, to only discover its not her. This then moved onto a mid shot, which meant the bag was not out of shot, so he had to position himself and the bag in a way that gave off the same feeling as the first shot. This carried on until a close up, where facial expressions were solely relied on.

We them moved on to 2 films with similar sequences (L.A. Confidential, made in 1997 and Heat, made in 1995). We had to analyse the footage shown to us and discuss the actor's performance, comparing their acting abilities. The actors in 'L.A. Confidential' simply read their lines with no improvisation or extra performance added to their role. This made it more difficult for the editor, as they had to attempt to edit it in a way that brought out the scene more. In 'Heat' however, the performance by Al Pacino and Robert De Niro was exceptional. They based how they would speak and move on each other, and play with each other's performance. In L.A. Confidential, they simply would read there line and each character would wait for them to finish there line and say their's, however Al Pacino and Robert De Niro would react to each others dialogue, changing the tempo of the speech/when they would execute their lines, to make for a much more interesting sequence. This made for a much better edit, allowing the editor to change camera's more fluently.

Overall, the first day of the workshop I found to be really interesting and helpful when looking into casting actors/actress', and how I would go about filming them/interacting with them.


Friday, 7 November 2014

Today we had Anne and Chris who showed us the art of set building. The idea was to get the 'Flat's' and assemble them together. The flats worked out as 4 flats across and to at the sides joint together. One piece of the wood was the hole/crack that the actor/actress will break through, so we found a Flat that had a door shape carved out of it and nailed in a few pieces of ply wood as we don't want the hole to be too big. Nick previously worked for a theatre, which came in handy when it came to making the set.


Nick working on putting the set together. 

We were then shown the different camera rig's that we could use for example the 'Spyder Dolly', which allows the grip to smoothly move the cameraman along on a track or without. The cameraman can move around on the seat to allow smooth movement. 


Thomas on the dolly. 

The next dolly we were shown was powered by a motor that needs to be charged that powers the movement of the camera and the seat, to allow for smooth up and down movement of the camera. 


We were then shown the green screen and how to light the subject accurately. Katherine experimented with the lights and we managed to discover some interesting lighting techniques that if we could achieve, would look really good for our DFSA advertisement. 


Lauren, our test subject as we experimented with lighting.

Thursday, 6 November 2014


Our second meeting with Rosie allowed us to discuss our idea of the visuals further, as last time the idea was still floating around, with major tweaks needed. I believe our group had made a lot of progress since the previous tutorial with Rosie. After discussing our ideas with Rosie, which is that we decided as a group to go back to the original idea, keeping it simple yet effective. 

The basic outline of our idea is a interactive brain that allows an individual or group of people to get involved in touching any of the four main parts of the brain, singularly or all together which will display a simplistic visual piece on the screen and play audio clips. Each part will be quite abstract and simple, not making much sense singularly, however when formed together will allow the user to see the bigger picture. Rosie advised us to go off individually, think of an idea for the visuals and film them using a DSLR. Testing is CRUCIAL. 

Material wise we will need a brain model to work with, made from polystyrene or clay, to allow us to make a mould of it from plastic. This will be made using the Vacuum forming machinery at the university. We also need to discuss the space we want to use in more detail with Rosie, however we know we definitely want it to be in the gallery space rather than a classroom, which came up as an idea when discussing spacing with Rosie. 

Tuesday, 4 November 2014

Currently our project has progressed a lot since I last discussed it on this blog. Since the pitch with Rosie, we've decided as a group to go back to the original idea of touching a part of the brain which triggers something (A visual element or sound element) and so forth. Here is where our project is currently: 


After research, mostly on Julia's part, we've decided to have a model brain (Made from vacuum forming a mould of a brain, allowing us to have a transparent brain that we can tweak i.e. add light up elements and so forth. We've decided to look at the 4 main parts of the brain that we can visually and sound wise represent on the screen: 


'Frontal lobes - planning and thinking. Monitoring higher order thinking, directing problem solving and regulating the excesses of the emotional system. Self will area, personality. Most of our memory.

Temporal lobes - above the ears. Deals with sound, music, face and object recognition and some parts of long term memory. Also house the speech centres although this is usually on the left side only.

Occipital lobes - exclusively for visual processing.


Parietal lobes - spatial orientation , calculation and certain types of recognition.' 


From several group meeting we've had, we've decided visually we are going to create something quite simplistic and easy to understand. The screen will show a simple situation, such as a man walking down a road past people and cars or perhaps having a conversation, which can easily be broken down into individual parts, 4 main parts of the brain to be more precise. The other lobes, for example the 'Temporal Lobe' will active inaudible speech. 

When only certain parts are touched by the user, and not synced together (all 4 parts touched at the same time) it will only show that element, for example if you only touch the Temporal Lobe, it will only play sound, whereas if you press all 4 elements together it will play sound and visuals in its whole form. 

The whole piece allows the viewer to get involved by interacting with the model of the brain, touching one of four parts and seeing the progression of the piece as they touch more than one element at a time. This allows a multitude of people such as a group of four, two people or even one person on their own to hold down parts of the brain to eventually see the whole, complete piece. 

The representation of the piece is to show that the parts of the brain work together as a whole to form a functioning visual/audible atmosphere for the person, but when separated, the parts of the brain struggle to form something that's whole. 


For visual research, Julia via our group's regular Skype meetings found a great website were someone made a model brain with LED's lighting it up inside it. This piece was done more as a DIY Sculptural experiment to see if he could make it. The designer, Quentin Thurtle, described it as such: 

"I was asked to make a 1Tb external hard drive in the form of a floor-standing, animated-brain sculpture. When not being accessed, it has a simple red-light pulse. When the hard drive is being accessed, it has a range of light display effects.' 

I like the way that Quentin displayed the piece on a plastic pillar, which makes the piece look professional and visually interesting. Our piece however will be more specific in the LED lights, rather than just using christmas lights that constantly flash. 


Due to Thomas knowing students that do Architecture at the university, and being at a university with talented art student and some amazing facilities such as the workshops I was inducted into recently for our Studio Shoot project, I feel confident in coming together and making a physical brain model that looks visually interesting and works the way I want it to. 


An accurate drawing done by Thomas


1. From pre-modernism to Modernism (mirror/replicate)

Picnic on the Grass- French painting

Perspective-

futurist- show movement (speed and direction)

High Modernism

clement greenberg

From Modernism to Post-Modernism (from subject to experience, understanding what painting is)

Jackson Pollock

Painting- 2-D technique finding colour and shape


Function of painting- Dominant white male

Showing different points of view- Female, mixed race

New view of reality

Most abstract art is done by jewish people

Minimalism- Taking abstract expressionism seriously (specific objects) from admiring to experiencing. Challenging vision coming from a single point of view

Modernism- Flat, colours

Land Art

Documentation of the process- movement (contemporary art)

Nasca lines

pop art- Background, foreground, re-production

Andy warhol

Contemporary art- (mashup of everything, 'not really')

Damian Hurst

YBA

Relational Aesthetics- literal work


Notes from Lecture:

Katharine Hepburn’s  ‘Adam’s Rib’  (1949)

Hollywood’

‘Rom-com’, Slapstick

Clever/comedic scripts, good acting.

Beginning, Middle, End

Illusion of reality- War, post-war trauma

Form of ‘Escapism’

Andy Warhol:  ‘Screen Test’  ‘Ready Made’

Still position- Shyness, Paranoia, being watched

Edie Sedgwick

Andy Warhol: ‘Empire State Building’

Still position: Rain droplets appear over time, light changes.

Narrative-less, looking at film rather than narrative

No edits, no actors/actresses, real life.

‘Underground’ work: Bruce Nauman’s ‘Walking in an Exaggerated Manner around the Perimeter of a Square) 1967-68

Interested in what you can do with film, rather than using techniques.

A ‘Niche’ that appeals to a certain audience.

Slow-paced

Narrative-less

What is he trying to say? Meaningless?

Richard Serra: ‘Hand Catching lead’

‘Pointless human action’- Humans seen as objects

Work isn’t realistic, looking at abstract qualities

Music and Rhythm- repetition of grabbing

‘Underground’- context, lifestyle and locations.

‘Avant-Garde’- Theory, art

Paul Sharit:  ‘Touching’ (1968)

Repeated work

Discovering new forms of film

Stan Brakhage ‘Mothlight’ (1963)

‘Interventional’ film

Objects/shapes put onto the actual film

‘Imaginative’ film- hard work

Similar to Jackson Pollock’s work

Malcolm Le Grice ‘Berlin House’ (1970)

Repetition of the movement

Experiment with the actual Film material

‘Chemicals, color’s, light’ make the film

Projected onto a screen through light- ‘Decomposing’ film

Peter Kubelka ‘Amulf Rainer’ (Late 50s)

Lighting- flashing then dark

Trying to find the specificity of the meaning- what is film made of? What is being recorded/shown?

Peter Gidal ‘Room Film’ (1970)

Films an entire room closely through zoom

Michael Snow ‘Wavelength’

Weeklong zoom into the window

Material/Essence of the film

Questioning film as a medium- Narrative, Characters, Time, Setting, and Color.

Changes color over time

‘Abstract’ film

‘Viewer’s experience/participation’- Realization that film is more than just the material.

Marcel Broodthaers ‘A Voyage on the North Sea: Art in the Age of the Post-Medium’ (1974)

Student of Greenberg (Late 60s)

‘Post-Medium’ condition (After Post-Modernism)

‘Museum of Modern Art: The Ego System’ 

What is art?

Pages of a book-  Different visuals (Materials, Paintings)

Different mediums showing the same item (Painting of a boat, photography, material of a boat) combining the elements (Placement, Faded, Movement, Canvas ‘Brushstrokes’)

Contrasting old/new forms of showing work


‘Specificity of the Medium’ (Painting)- Concept film
                                                                                                               

Rosalind Krauss: ''A Voyage on the North Sea'': Art in the Age of the Post-Medium Condition


Understanding as something that can be transferred to other mediums


Specificity doesn’t have to lie within a certain medium- Art is no longer separated, same as film.


‘Define Specificity of art itself’


‘Rules that restructure projection’ – Television Delivers People (1973)


Film is a blend of mediums and layers of conventions- Pointless trying to find specificity


Modernist Movement- Break between what has been built to the current day


‘New categories must be made’- from Art, Film, Sculpture etc to something new.
 
© 2012. Design by Main-Blogger - Blogger Template and Blogging Stuff