• Twitter
  • Facebook
  • Google+
  • RSS Feed
Showing posts with label 3D (Professional Toolkit). Show all posts

Monday, 16 March 2015

After we finished the workshops with Tanguy I decided to make some minor tweaks to my objects. I firstly added my own texture and changed the colour to my Spaceship. I also added a gun at the front to make it look more realistic and to make it look like the ship has a gun.
 Front of my ship
 Back of my ship
New texture for my ship 

I then re-did my asteroid's UV to something more clear meaning it would be easier to customise. 
New UV map of my asteroid.
With all my objects exported, I decided to use them in my Space Shooter game for the other unit, Interactivity. I feel proud of the effort I put in and hours of UV mapping each object properly. Im happy with the output of each object and because of this I put it in my Space Shooter game. I enjoyed using 'Sculptris' as I found it gave good alternative results to using Maya and could make really realistic looking objects such as the 'Moon' I made:
Imported 'Sculptris' file in Maya. 
I don't think i'm at a professional level of making 3-D objects, however I feel confident now going into Maya and making different shapes, which I didn't think I could do when I began the project. I feel Tanguy showed us how to do each object very clearly and the help he gave us was also very useful. I would like to further develop my knowledge in Maya and I hope to play around with the program in the future and see if I can make anything a bit more advanced. 

Tuesday, 3 March 2015

During this lesson we looked at making a UFO for our Space Shooter game we're currently making in unity. We began with a simple cylinder shape and manipulated the faces and extruded the top out to make it a more accurate ufo-like shape.


We then looked at UV mapping our UFO. Luckily my shape was quite simplistic, with not too many Edge loops. I 'Planar' mapped by UFO s this gave the most accurate representation of it.


Finished UV map. 

The UV map was then snapshotted and taken into photoshop and edited. I changed it a few times to get the best look for my UFO. 


Original design


Final design

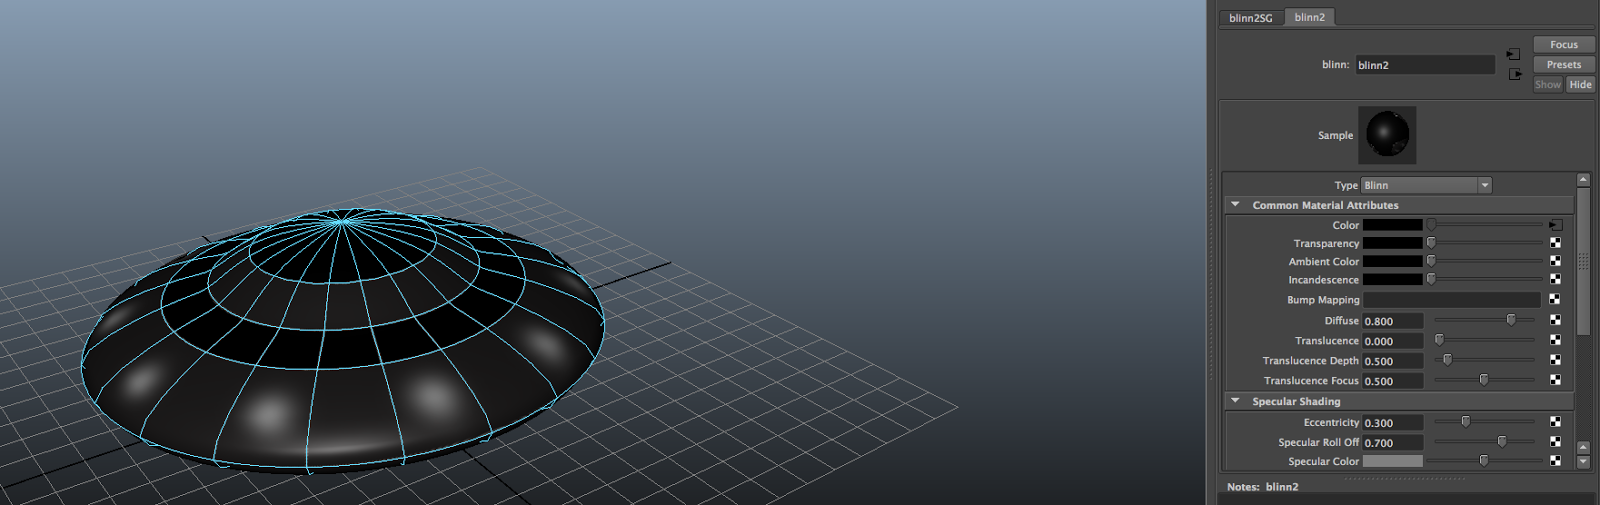
We then added a 'Blinn' material to our UFO and imported our finished image. This process was the same as how we did the spaceship. 


Original Imported mapping onto our UFO


Edited version imported

The 'Specularmap' image used allowed the spaceship to become more metallic-looking, to make it look more realistic and shine.

We then looked at making the elements of our UFO more realistic. To do this we would make the spherical shapes on our UFO 3D by making a new sphere object and moving them to the correct positions around the UFO.


Sphere's added to the UFO. 

To attach the sphere's to the ship we had to use the 'Transfer Maps' tool. The target mesh, being the shape we will attach the spheres too, was our UFO and the source meshes were the spheres themselves. The output was set to 'Normal' and was then baked. 


'Baked' UFO. 

Sadly it didn't come out the way I expected however I will repeat the process at a later date to make the sphere's smaller so that the colour's don't bleed as much as they did.

We lastly looked at animating our spaceship, for our Space Shooter game. This was done by adding keyframes and the first and last frame, starting the X axis at '0' and changing it at the last frame to '360' so it rotates 360 degrees.


The 'Time Slider' within Maya. 


Monday, 16 February 2015

During today's lesson we made craters and moons for our game using a new piece of software called Sculptris Alpha 6.


Screenshot of the program.


We began by editing our sphere. To do this I mainly used the draw tool (Clicking 'X' to make it make an indent rather than add a new shape) and the smooth tool.


Rough sketch in Sculptris.


Tool's in Sculptris.

I then saved the file and exported it and imported it into Maya. To make the crater look more realistic and to get multiple versions in hi and low resolution we created a new sphere and positioned and changed the size to fit our current crater we made in Sculptris. 


To blend the two hi and low res shapes together we clicked the spacebar and clicked on lighting/shading and added a 'normal' map to the shape made in Sculptris. We then exported this and did the same for the sphere made in Maya, however we selected 'Ambient' instead.


We then baked the maps and saved them as TGA files so it could be recognised in photoshop, which was the next part.


This was the 'Alpha' and 'normal' export from Maya and I edited out the triangles from the UV map and saved it. We then added a 'Blinn' material to the normal sphere and the sphere made in Sculptris and added our edited photoshop file to it.


Before 'Blinn' input was placed on the normal sphere


After


This was the final version of my crater. I went back into Sculptris and added more holes and lumps to the crater. It was a long process however I enjoyed making a realistic looking crater.


Edited crater and asteroid in Maya. 

Thursday, 12 February 2015

During our second lesson we learnt how to make an asteroid for our game we are making in our interactivity lessons. We started with inserting a sphere object. 


UV map of the sphere. 

The shape was then manipulated by extruding the faces of the sphere. By adding a smoothing to the shape, the shape looked a lot smoother and less sharp, creating a more accurate looking asteroid. I then inserted a 'Blinn' and added an image over the object. The image was a texture found on the internet that I edited using photoshop. 


I then found a better texture and edited the colour so it had a tint of red. I found this looked a lot more like a space-rock like colour. 


The UV texturing was a very difficult process, however from starting off with a quite messy UV map of my shape, I managed to separate the faces on the UV map.


We did the same process with a cube shape (as shown below) and the UV mapping turned out to be a lot more simplified and easier to move.


UV mapping for the asteroid made from a cube. 


Overall i'm happy with the shape and look of my asteroid and I feel I will definitely use it in my game.

Monday, 2 February 2015

Today we were introduced to Tanguy Dewarvin, who is a professional within the games industry, creating his own games and helping teach programs such as Maya, which is the piece of 3D software we will be using which I have never used before. As 3D and Interactivity link together, we found out we will be making all the objects within Maya, such as the spaceship and asteroid's. This can then be imported in Unity for our interactivity project. Im looking forward to working on both projects as combining the skills I learn in both workshops. 

We learnt how to use a technique called 'Box Modelling', which allows us to experiment with a shape and morph it into something more complex, adding more and more layers. One technique I instantly found helpful was the duplicate key, which meant you  only had to do one half of your ship and then duplicate and move it together. This is a very useful key as it allows your work to be symmetrical and it also saves a lot of time. 

During the Maya working process, I decided to take several screenshots of the progress of my spaceship. Similar to Unity, I found it difficult to begin with, however Tanguy was very helpful and would talk to me individually and give me pointers and tips to save time and get a more professional, accurate finish to my spaceship. 


We began with a basic square. 


I began by simply resizing the shape to a more rectangular shape. I then manipulated the shape by scaling and transforming the faces, which would then add another shape onto the current shape, which you can then move around and re-shape to whatever you like. By Extruding the sides I could add wings to my spaceship. I then rotated the arms slightly upwards so they didn't look completely flat. 


I then extruded the front and back to give my shape a more robotic, spaceship-like shape. 


Once realising I needed to move the arms in the opposite direction, I decided to manipulate the front and back even further by playing with the faces, reshaping them to make them more diagonal and pointy to make my spaceship look more spaceship-like. 


I then added wings to the top of my spaceship by inserting a plane and connecting it to the top and duplicating it, however I was told by Tanguy that when it comes to UV mapping the sapceship, it doesnt work on flat plane surfaces. 


I decided to add triangular whole shape wings to my spaceship (Look a bit like cat ears!) which is a simple shape so it shouldn't be too difficult to UV Map. Tanguy also helped simplify my shape so that it would be less of a hassle to UV Map as difficult shapes can morph together which means more time is needed to separate them. 


I then went onto UV mapping, which was a very long process as a lot of my shapes were closed together and all over the place. After about an hour or so of moving each part, I then exported the UV Map and changed the color to black for the meantime in photoshop. 


Edited UV Map. 


Rough finished spaceship.

Im quite proud of the work I did today and im happy with the spaceship I produced. I look forward to using my spaceship within Unity and I feel I am learning valuable tools that will help for the future when it comes to creating new projects. 
 
© 2012. Design by Main-Blogger - Blogger Template and Blogging Stuff