Raw footage
Shahid's Corrected footage
I worked on the footage by increasing the brightness and decreasing the contrast a little in Premiere also, but also by colour correcting the image as the original footage was quite green-y/yellow.
After my colour correction
Because of the darkness of the image, I decided to incorporate a few parts from the original interview I did with Buffalo Fish, as this had no lighting issues and also included some great closing statements from Terry and the band.
Original interview footage screenshot.
After I fixed the footage I went onto working on the music for the film and then the introduction titles in further depth and also the credits.
For the music of the film I gained permission to use some of Buffalo Fish' tracks in addition to new Airforce tracks and old tracks written by Doug and my father, Stephen. I organised the music by putting in into a bin named 'Sound (FX and Music)':
Bin for Sound.
I then made sure the tracks I was using was lower during the dialogue parts as it was in comparison to the parts with the archive imagery and no dialogue, where I can rise the levels up and down again once the archive imagery has disappeared.
Music levels during archive images
Music level during interview dialogue.
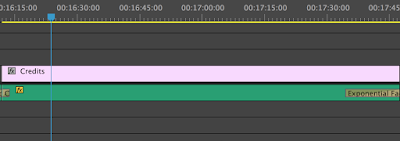
To make this cut smooth and flow, I once again added a audio transition to do this, being the Constant and Exponential Fade.
Fade transitioned applied in the timeline
After I did this I worked on the music level for the credits and I decided to choose a new Airforce track, which I felt worked well as an outro track:
For the credits I added a new default title roll:
Title roll effect added
When setting up the rolling credits I added a value to the ease out and postroll so that the credits could roll upwards and start off screen in addition to rolling off the screen towards the end.
Roll settings
I then applied all of the credits through two text boxes, one side being the roles and the other side being the names of the participants.
Title layout
I then scrolled down the image and made sure the last titles was off the screen so that the titles go off the screen at the end of the roll.
End titles off screen
Overall I am pleased with the outcome of the titles and through following the professional BBC credit guidelines, I feel I have made a professional credit sequence at the end of my film.
Screengrab of the final credits.
When looking at the introduction I decided to do a freeze-frame effect of each character after the title sequence so that you are familiar with who the film will be about even before you watch the film. Due to the fast cutting pace of the film, I felt this was necessary so that it is clear from the start and keeps the viewer focused and clear regarding who the film is about and who each character is.
Screengrab of freeze frame of Terry.
I also decided to use Royalty Free music website called 'Looperman' and found a heavy guitar riff I could put over the footage of them performing, which then freezes.
Website used.
'Corroded Guitars 2' WAV sound file used in my film.
The effect was done by using royalty free footage of a glitch effect that I found on a royalty free video website. I applied the effect to the title and made sure it was an 'Overlay' so that it was behind the image but still applied a glitch effect to the text.
I feel the final glitch came out really well and i'm pleased with its final outcome. I then went onto watch the film in full with Anne and got some constructive criticism, which was mainly to cut down some of the interview parts further and include some different parts which exacerbate the ex-iron maidener's passion for the music. After doing so I showed Julia who felt that the film was clear and accurately represented what I am trying to say in my film. I will later evaluate my overall thoughts and feelings of the project in my evaluation, which I will put on my blog.
Full timeline of the film in Premiere.


No comments:
Post a Comment